
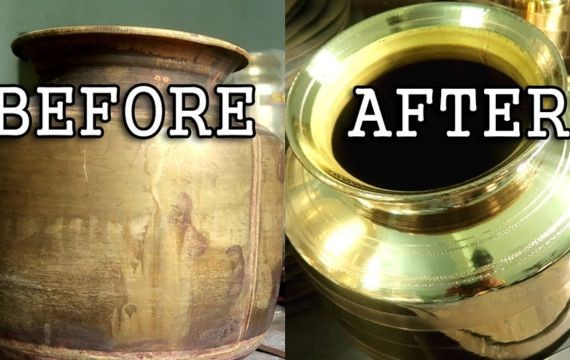
This guide will take you through the fundamental aspects of the brass polishing process. So, if you have any brass product you would like to polish, then this is the guide you have been looking for.
Let’s dive right in:
Step 1: Gather Up Materials and Tools
To begin polishing the brass products, the first step is to gather materials and tools. The list of key materials and tools you need is as follows:
- Soft cloth
- Rag
- Mild detergent or soap
- Slightly warm water
- Bowl or a Bucket
- Standard toothbrush or brush featuring soft bristles
- Gloves
- Goggles
Step 2: Work Area Prep
Select or finalize the work area that features enough level of air cross-over. Better air circulation prevents the accumulation of odor. Lay down the clothing or any covering on the surface where you are carrying out brass polish. This will not affect the underlying surface because of spills or drippings. Careful selection of the space allows you to move around without any hassle.
Step 3: Choose a Particular Brass Polishing Process
1. Homemade Techniques
If you are the one who prefers homemade solutions, the brass polish can be made from ingredients that you probably have at home. An efficient homemade polish for brass is a paste of equal parts vinegar and flour.
Another alternative is to combine lemon juice and baking soda to make a paste. The homemade polishes are mild but very powerful in tarnish-removal and brass product restoration.
2. Commercial Techniques
The commercial brass polishes could be easily bought at nearly any hardware or home improvement store. They are available in different kinds, including creams, pastes, or sprays.
Most of them hold special components that help tarnish decomposition and leave a layer of protection on the brass surface. Select a commercial brass polish depending on your liking and the degree of stain on your brass products.
Clean Out Surface
Prior to polishing, wash the brass product surface clean. In a bowl or bucket, dissolve a tiny bit of gentle dish detergent in hot water. With the help of a rag or soft cloth, wipe out the brass surface. You can also use the brush for this purpose to get rid of grime or dust.
Polish Application
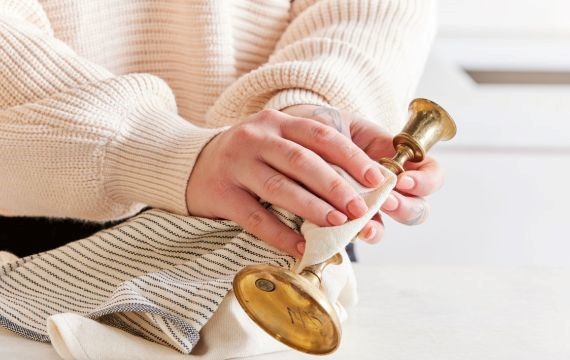
Once the brass surface is clean and dry, start using the brass polish. If you own homemade polish, use a small amount on the surface of the brass by using a soft cloth or rag.
Polish the brass by rubbing the polish in a circular motion, one section at a time. The polish is used if a commercial one should be looked at by the user for better results. Leave the polish to settle on the brass for a couple of minutes, and thus, let it penetrate and clean out any tarnish.
Then, you should use a clean cloth or rag to shine the brass surface until it is reflecting. The process should be conducted as many times as needed to achieve the required degree of shine and glossiness of your brass items.
Employ Brass Buffing
Besides, buffing the brass after polishing will brighten it up and eliminate a last bit of residue. For bigger brass items, you can use a soft, dry cloth or a buffing wheel that does not have any rough edge fixed to a power tool.
Once more, use circular movements to polish the brass, pressing lightly to a glossy result. Do not be overzealous, as this may result in scratches on the brass. Polish until the brass sparkles, just like the mirror.
If Necessary, Apply a Protective Coating
You can use the lacquer or wax as your protective coating. Using a lacquer, make sure the brass surface is thoroughly clean and dry before application.
Lacquer should be sprayed evenly, in a thin layer, on brass, keeping the can 6-8 inches away from the surface. Per the manufacturer’s instructions, let the lacquer dry properly before handling brass.
In a different approach, a soft cloth can be used to apply a thin layer of wax to the brass surface, rubbing the wax in a circular motion. Polish the waxed area lightly and leave a smooth, protective surface.
Inspect for Quality
After the polishing, buffing, and protective coating steps are finished, check them briefly for any imperfections or missed spots. Wipe off any fingerprints or smudges by the use of a dry and clean cloth.
Inspect the whole area of the brass for uniformity of gloss and deposited protective layer. If you see any parts that need additional work, perform the required steps again as many times as necessary to obtain the desired results.
Focusing on the details during the final inspection will guarantee that your brass products will look great and their brightness will last for years.
Cleaning Up
In the end, tidy up your work area by throwing used wiping cloths, gloves, and empty polish or coating containers into the appropriate disposal bins.
Clean the surfaces that come in touch with the polish or residue so as to avoid staining or damage. Keep the supplies for your polishing in a well-ventilated area, away from the sun and moisture, so that they are always available when you decide to use them again.
Proper cleanup after polishing brass products will help to keep the workplace neat and prolong the life of tools and materials.
Things To Pay Attention To While Polishing Brass
Regarding polishing brass, some considerations are required to ensure a favorable result without compromising the shine and state of the metal. undefined
Considerations for Safety
- Always use protective gear such as gloves and goggles before you start. This will protect you from chemicals and sharp edges.
- Provide proper ventilation in the work area to avoid breathing in fumes from the polishing compounds.
Brass Surface Preparation
- Please note that you should always use mild detergent when washing the brass surface. This assists in the effective removal of grime, dirt, and grease.
- Dry effectively, as this will help you prevent water spots formation on the surface.
Select the Appropriate Polishing Compound
- Select a brass-appropriate polishing compound. Seek for products with the label designed for use on brass surfaces.
- You should also take into account the degree of tarnishing or oxidation of the brass in choosing the right abrasive strength of the compound.
Point Our Spots
- Please test the polish on the smaller area before polishing the entire surface.
- Spot testing helps you assess if the compound works well with your brass product or not.
- This is to evaluate the performance of the compound without the threat of spoiling the whole brass item.
Apply Properly
- Put a small drop of the polishing compound on a soft cloth or an applicator pad.
- Work it into the surface of the brass using a gentle, circular motion and applying even pressure.
- Do not apply too much force, as brass is a soft metal and can be scratched easily.
Polishing and Buffing
- Buff the brass surface with a clean, soft cloth or buffing wheel after applying the polishing compound.
- Buff along the grain or design of the piece of brass for an even luster.
- Keep buffing until the required polish is obtained, so check your work from time to time.
Prioritize Consistency
- Following buffing, examine the brass surface for the uniformity of shine and texture.
- Seek any parts that may need some further polishing or buffing for a uniform finish.
Prevent Over-Polishing
- Do not over-polish the brass since this may remove the protective layer, and tarnishing will occur faster.
- Do not go over the surface once the shine is achieved if there are some small defects left.
Lastly, Cleaning and Protection
- Clean any remaining polish compound by rubbing the finished brass surface with a clean, dry cloth.
- Brush lightly brass polish or protective wax to keep the shine and prevent the surface from tarnishing.
- Keep the tarnish-free brass object in a dust-free, dry place.
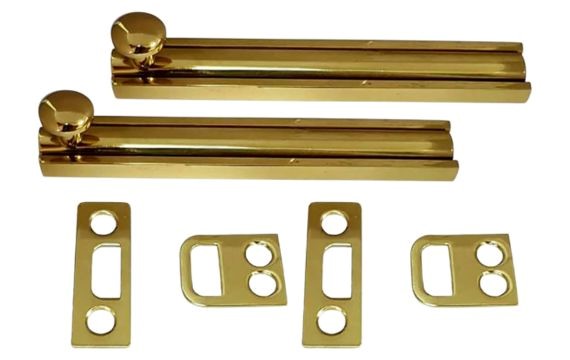
At KDMFAB, we fabricate different brass with custom surface finishing options available depending on our customer requirements.
More Resources:
Types of Brass Finishing – Source: KDMFAB
Does Brass Rust – Source: KDM
Is Brass Magnetic? – Source: KDM
A Comparison Between Red Brass Vs Yellow Brass – Source: KDM