
Creative individuals can etch on metal to showcase their talents and get polished and stunning final product. Different industries use metal etching applications.
You should have the appropriate tools and materials. Metal etching allows individuals to display their abilities both visually and practically.
In this blog post, we will cover the definition of metal etching, its significance and uses, tips for success, various techniques to try, and common mistakes made during the process. Let’s delve into the world of etching on metal!
Preparing The Metal Surface!

Figure 1 – Cleaning Metal Surface for Etching
Etching on metal surface, when creating art using metal etching, the first and most important step is to properly prepare your working surface. Properly preparing the surfaces ensures accurate results.
Also it achieves uniformity with each piece of artwork created during a project. Below is the process of preparing your metal surface.
§ Cleaning The Metal
How to remove etching on metal, an integral part of the preparation process is cleaning. Remove any kind of dirt, dust, oil, and grease that may be present on the surface.
To ensure your pieces come out well-defined and uniform, it is necessary that the surface be completely free of any debris for best results.
Using reliable steel wool removes major particles while providing a smooth and luminous finish, making it an easy way to clean your surfaces.
§ Selecting The Right Metal
When selecting the right metal, consider factors such as size and chemical composition. Oftentimes, materials with a suitable thickness range between 0.2 mm and 3 mm for etching are used.
Especially, this is true when precision matters most. Etchers often popularly use tin sheets and copper plates.
Chosen for their heaviness, durability, and chemical resistance qualities, these attributes make them ideally suited for the process of metal etching.
Additionally, other ferric metals such as mild steel (hot-rolled or cold-rolled) and care also well suited for etching.
§ Applying Resist Material
Once you’ve selected the right kind of metal, it is time to apply a suitable ink or resist material so that it will protect exposed portions of the metal from being etched. It’s a crucial step in the preparation process.
An etcher’s goal should always be to create highly detailed and precise pieces. Focus on intricate details or other areas that may require more attention when designing project pieces.
Resist materials are typically applied using any type of pressure-forcing mechanism such as, a pad printer or manual methods with the help of brushes, rollers, and syringes to provide accurate coverage area results.
§ Design Transfer
After properly laying the ink or resist material, consider a method to transfer your design onto the metal without smudging them. For an effective result, it is important to know which technique works best.
Understanding what kind of machines should be used during this process is crucial to ensure the designs remain intact, with some popular methods of design transfer including photoengraving, photographic imaging, and traditional resist approaches.
Such methods use heat-resistant vinyl, allowing us to trace intricate patterns with a sharp-edged marker pen to give precise results without smudging them.
§ Exposing The Design
During this step, ink and stencil technologies are used to expose dire resist or other sun-sensitive layers onto an emulsion-primed surface.
Exposing serves the purpose of ensuring that your designs remain intact during the etching process, while also making them visible on a substrate for better accuracy.
Coating thick stencils with an exposed polymer will prevent the under-cut of thin sections in your artwork designs, and this is done without compromising their look or structural integrity.
§ Developing The Design
During this stage, you need to use chemicals and developers to ensures that original designs remain proactive on the substrate during the etching process.
Once exposed, add an emulsion film of your choice depending on their reactivity. Not to mention, this can be a liquid or dry variety.
Make sure to follow the instructions carefully. Misapplication of this stage can result in issues during further etching processes.
§ Etching
You need to etch the metal now, which is accomplished using an acid solution.
Etching on metal creates intricate patterns on your piece without compromising its structural integrity.
Acid etching on metal, advanced etching machines, acid solutions, sanding or filing can be used to create highly detailed and complex artwork pieces.
Etching allows artists to bring their visions to life on metal surfaces, creating one-of-a-kind art that showcases their skill and creativity.
Ensure that your metal etching projects result in stunning, intricate pieces by carefully following each step and using the appropriate materials and techniques so they can be enjoyed for years to come.
So, go ahead and explore the fascinating world of metal etching and create your own unique masterpieces.
| Step | Task | Technical Terms & Considerations |
| 1. Cleaning the metal | Remove dirt, dust, oil, and grease from the surface | Steel wool for cleaning |
| 2. Selecting the metal | Choose metal based on size and chemical composition | Thickness: 0.2mm – 3mm, Tin sheets, Copper plates, Ferric metals |
| 3. Applying resist | Apply ink or resist material to protect the metal | Pad printer, Brushes, Rollers, Syringes |
| 4. Design transfer | Transfer design onto metal without smudging | Photoengraving, Photographic imaging, Traditional resist approaches |
| 5. Exposing the design | Use ink and stencil technologies on emulsion primed surface | Emulsion primed surface, Exposed polymer |
| 6. Developing the design | Apply chemicals and developers to the design | Emulsion film (liquid or dry) |
| 7. Etching the metal | Remove metal from the surface using an acid solution | Acid solution, Etching machines, Sanding, Filing |
Table Name: Metal Etching Preparation Process
Tools And Materials For Metal Etching!
For those who are looking to explore the art of etching, you’ll need several tools and materials that can be found both online and offline!
When it comes to metal-etching, a wide range of products is required. You’ll need etching acids, brushes, protective gear, stencils, plates, and resist materials. Such items are all necessary for a successful project.
§ Etching Acids
An acid is the first tool you’ll need, and with many types used in the process, the best choice depends on whether an alkaline or electrochemical medium method is most suitable.
Either way, you’ll need to apply the acid with a brush or applicator. With each type of metal and its properties in mind, select an etching option that works well for your project!
§ Brushes And Other Applicators
Using the right brush or applicator helps to evenly apply the acid, which in turn creates your desired design.
Depending on how much area you are looking to cover, opt for a chisel-tip marker-style pen.
You could also use a magnetic tool in different widths. For example, if you are covering a large area, use an applicator with broader strokes!
§ Protective Gear
Chemical etching on metal, no matter what type of acid or chemical treatment you are using, wear protective gear. You’ll need gloves and eyewear. Ingesting even a small amount can be toxic!
§ Metal Sheets Or Plates
Etching on metal plate, you’ll need an etching surface for your project. Use thin metal sheets like brass plates that will give you a smooth and even finish. Moreover, it provides great detail when carving out your design or stencil onto the metal plate.
§ Stencils Or Designs
Picture etching on metal, after selecting a plate and acid, begin contemplating your design, and either print out the picture or utilize a micro-etching stencil to etch your chosen design onto the metal surface.
§ Resist Materials
Resist materials are of different types. And, the most popular type is ground rubber ink as well as used to create consistently clean lines on metals such as aluminum and stainless steel!
§ Etching Tank
How to do etching on metal, an etching tank is needed for the process, coming in various sizes and forms. Depending on how much area needs to be covered, opt for one that’s bigger than your sheet!
People looking to explore metal etching as a hobby or profession can start by using the right tools and materials.
With these tips in mind and KDMfab’s industrial metal etching machine, your project will be a success. When it comes to this art form – think of KDMFab for the professional touch!
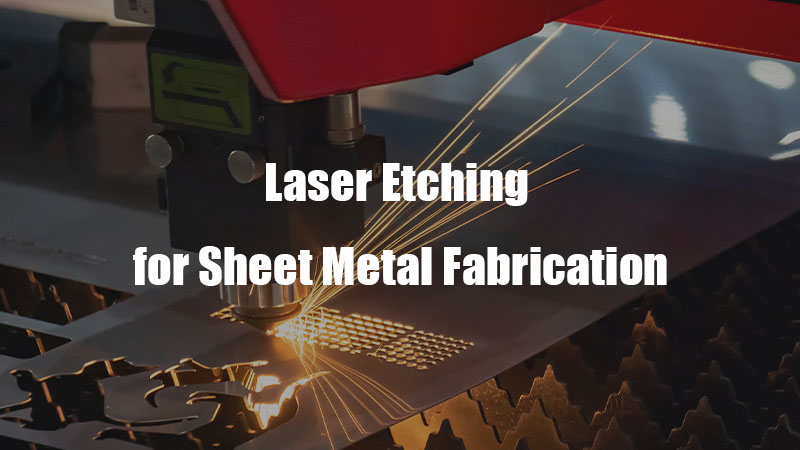
Techniques Of Metal Etching!

Figure 3 – Laser Etching Process
Etching on metal is an effective artwork today. Many artists rely on this technique as they recreate their creativity and artwork onto metal items.
Utilize four main techniques to add appeal and charm: traditional, photo, electro-etching, and laser methods.
§ Traditional Etching
Careful manual etching used a sharp tool to resin away the material for hundreds of years.
Slowly uncovering and detailing artwork on metal sheets or other items involves applying a resistive paste on areas where a design should appear, and then submerging the item under acid or another substance to remove exposed material.
§ Photo Etching
Photo etching on metal, utilizing a photographic process for digital artwork, photochemical etching involves applying a photo-resist to metal, exposing it to UV light, and subsequently submerging areas without resistance in acid.
Allowing easy cutting of intricate patterns, this method is popular among jewelry makers that creates even the smallest details or geometries.
§ Electro-Etching
Commonly employing electricity to etch metal, people utilize various chemicals and resistive masks, applying an electrical current to the surface of the substrate material.
You can easily etch out different artwork or patterns for quick removal of sections of the material!
§ Laser Etching
Laser etching on metal, utilizing laser beams, the most modern method for etching on metal effectively removes the required space, revealing desired shapes and figures in the process. A powerful laser beam carves out intricate designs with precision.
Often used in industries and featuring applications in potential etching artistry, this method provides an easy way to create images or engravings on metal, glass, ceramics, and other hard surfaces.
| Technique | Process Description | Common Materials | Tools / Equipment |
| Traditional | 1. Apply resistive paste to design areas. 2. Submerge the item in acid or another substance to remove exposed material. | Metal sheets, various metals | Sharp tool, resistive paste, acid or other substance |
| Photo Etching | 1. Apply a photo-resist to metal. 2. Expose metal to UV light. 3. Submerge areas without resist in acid to cut intricate patterns. | Various metals, gold, silver | Photo-resist, UV light, acid |
| Electro-etching | 1. Apply various chemicals and resistive masks. 2. Apply an electrical current to the substrate material surface to remove sections of the material. | Various metals, copper, brass | Chemicals, resistive masks, electrical current |
| Laser Etching | 1. Use a powerful laser beam to carve out intricate designs with precision on metal, glass, ceramics, and other hard surfaces. | Metal, glass, ceramics | Laser etching machine |
Metal Etching Techniques And Technical Information
Etching Process Step By Step!
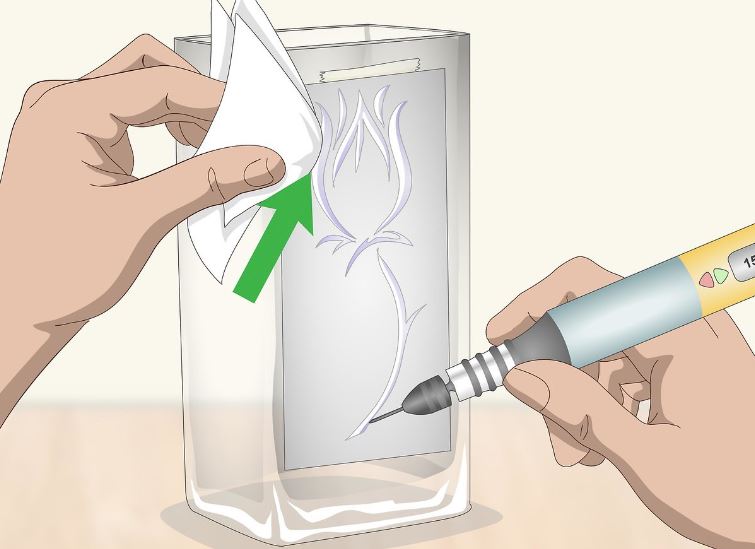
Figure 4 – Etching Process Guide
Learning the art of etching on metal can be creative and satisfying. A clear plan helps make things go smoother! Here are the steps for etching on metal.
§ Applying Resist Material
Applying protective material (the resist) serves as the first step, covering areas that should remain unaffected while leaving the portions to be etched visible.
Depending on your project, the type of resistance can involve tapes or masking materials for simple endeavors, often utilizing a metal etching machine.
§ Exposing The Metal
With the resist in place, expose areas to be etched that involves processes like templating or sanding.
Ensure everything is ready before proceeding by making multiple passes with complex etchings.
§ Preparing The Etching Acid
Third part requires preparing an acid bath that bath causes a chemical reaction in exposed areas. In turn, this creates your etched design.
Different metals need different acids. Some popular choices are hydrochloric acid and sulfuric mixtures.
§ Etching The Metal
With your resist on and exposed areas revealed, prepare the etch-acid bath. Move the metal onto a platform over your etching acid.
Do this carefully and quickly. Make sure no sections overlap.
§ Removing The Resist
Finally, remove the metal from the tank. All that remains is to remove the resistance and reveal your beautiful etching!
Depending on the resistance materials used, the method of removal may require scrubbing or employing a solvent such as sulfuric acid.
Follow these techniques for a successful etching on metal.
| Step | Technical Term | Description | Example Materials/Tools |
| 1. Applying resist material | Resist | Protective layer applied to protect areas not to be etched | Tapes, masking materials, metal etching machine |
| 2. Exposing the metal | Templating, Sanding | Techniques used to reveal the areas to be etched | Stencils, templates, sanding tools |
| 3. Preparing the etching acid | Acid-bath | Solution prepared for the etching process | Hydrochloric acid, sulfuric acid mixtures |
| 4. Etching the metal | Etch-acid bath | Immersing the metal in the prepared acid bath to create the etched design | Acid-resistant container, gloves, goggles, platform |
| 5. Removing the resist | Resist removal | Process of taking off the protective layer to reveal the etched design | Scrubbing tools, solvents, sulfuric acid |
Etching Process Technical Information
Tips For Successful Metal Etching!

Figure 5 – A Successful Metal Etching
Different metals require unique work approaches to achieve beautiful etching results.
Metal surfaces are not all created equal, and learning the different techniques for metal engraving can help accelerate projects. Here’s everything you need to consider before starting a project!
§ Proper Safety Measures
Safety should always take priority when carrying out any metal etching project. Protective gear is required, particularly breathing masks and gloves that protect skin from hazardous chemicals. Wrap up well to avoid debris or acid splashes finding their way onto exposed areas like eyes or skin.
§ Careful Handling Of Tools And Materials
Various metals are malleable, but not all etching techniques will suit each type you encounter. Be sure to inspect the metal before beginning so that you know its composition and its etching properties. Also, this will ensure that the metal won’t be irreparably damaged in any way through the process.
§ Choosing The Right Etching Acid
Etchants are acids used to corrode metal surfaces, so selecting the right one for your project is essential. Copper-based alloys require nitric acid, stainless steel works better with hydrochloric or sulfuric acid, and brass fares best when exposed to a mixture of hydrochloric and nitrates. There are also environmentally-friendly etchants available that may be better suited to some projects than traditional acid-based ones.
§ Selecting Appropriate Resist Material
A suitable application of ‘resist’ or masking agents is required to protect the metal surface from being etched away.
For ferrous metals such as iron, one needs acid resists and paints whereas epoxies are recommended for use with aluminum in order to maintain the etch.
§ Try Different Methods
You should highly recommend experimenting with different techniques to find what works best for you and each situation.
Best acid for etching steel, For example, electro-etching steel offers an economical solution that is particularly suited to stainless components or pieces joined by soldering as it won’t deteriorate the alloy in any way.
Common Mistakes In Metal Etching!
Many people want to achieve artistic effects through metal etching.
However, mistakes can happen without experience or knowledge, and may cause damage to your projects. Understanding common errors will help you maximize outcomes.
§ Over-Etching
Over-etching happens when metal is exposed for too long. Etching acids can cause damage and discoloration as well as may ruin monogrammed engravings. To avoid over-etching, use a timer. Rinse the workpiece after each step.
§ Under-Etching
Under-etching, the opposite of over-etching, occurs when not enough time is given, leading to undercut engraved lines and making them too light for visible effects.
Additionally, it can reduce the durability of an item. Your etchings will be weaker and less long-lasting. To avoid under-etching, use a timer for each step for consistent results.
§ Poor Transfer Of Design
A common mistake is using inadequate transfer methods that can show in the end results. Not properly preparing your design can cause issues. Blurred lines or incomplete designs may occur. To achieve the best results, use quality materials. Utilize a reliable printing technique.
§ Inadequate Cleaning Of The Metal
Properly wiping down your workpiece is essential to ensure consistent results for each project, as inadequate cleaning may lead to dirt particles.
Smudges in your etching can also occur, leading to poor results that don’t do justice to your design.
To avoid this mistake, use quality stone polishing. Sanding can also help you achieve pristine results.
Applications Of Metal Etching!

Figure 6 – Etching on Jewelry
Many creatives are drawn to metal etching that adds texture and intricate details. Metal etching is great for creating stunning jewelry, printed works, or industrial products.
Standing out from the crowd, metal etching has diverse applications that are utilized across various industries, providing a closer look at its versatile nature.
§ Jewelry Making
Metal etching has enabled crafters to express themselves through designs, and is particularly used for jewelry making.
Etching intricate patterns and designs makes jewelry a canvas for beautiful art. Brass and copper are two good surfaces for this art.
Creating bold statement necklaces or delicate earrings is possible by utilizing a metal etching machine, which allows for intricate and unique designs.
§ Printmaking
Metal plates are used in printmaking for various reasons such as durability, longevity, and perfect outcomes each time.
Also, they provide fine detailing that is difficult to achieve by other means. Etching metal plates has become popular for artists and printmakers.
Allowing artists to display their work with beautiful, hand-struck details, these pieces showcase the intricate craftsmanship inherent in each image or pattern.
§ Industrial Applications
Different industries use this art of imprinting on metals as it is imperative for their business! Metal plates are used to ensure the end product meets all requirements.
Metal plates stand strong against wear and tear. A metal etching machine achieves different textures and finishes.
Examples are etched circuit boards for industrial machines or metal components with pattern to create an extra texture that wouldn’t have been achievable any other way.
§ Artistic Expression
More often than not, metal etching creates captivating artwork that adds a unique touch and texture to any piece of work.
Photographers use it as an alternative canvas for landscapes or portraits to add interesting shadows and details that highlight the beauty of their craftsmanship.
Engravers use metal etching techniques to create masterpieces with unique textures and intricate designs that can’t be replicated by other means.
Conclusion
Etching on metal is complex, and requires special machinery and the right chemicals. You need experienced technicians for excellent results.
Whether you need professional electro-etching steel or DIY metal etching, reliable equipment is essential. Dependable products produce a quality outcome.
KDMFab offers professional-grade metal etching machines. At the same time, they provide reliable supplies for metal etching projects, and ensure excellent results with every project.
Etching on metal at home, You can create beautiful metal designs easily at home or in the shop. Try out their products today. Achieve flawless etched masterpieces on any metal surface.
KDMFab offer metal etching photo and metal etching semiconductor services. Their metal etching chemical is perfect for chemical etching projects. Don’t wait, explore their offerings now.